

After you have created the database, if you have selected the Create tables using the table wizard check box, the table wizard opens. If you have not, go to the Task area and click Use Wizard to Create Table. Next, define the fields you want to use in your database table.
In this example, set up an address database.
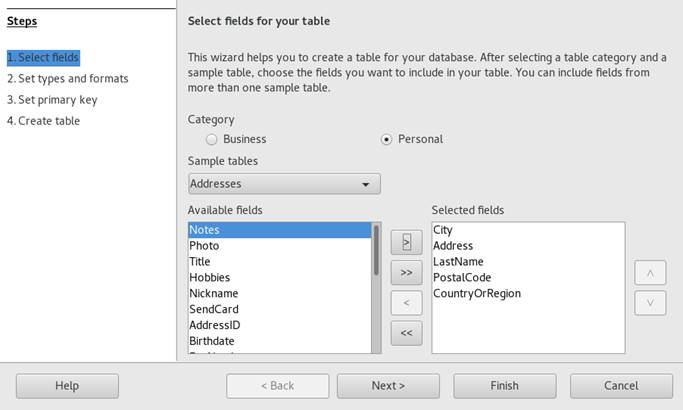
For this example, click Personal.
The list Sample tables changes to show the predefined tables for personal use where the address table template is. The table templates listed under Business contain predefined business tables.
In the Sample tables list, click Addresses.
The available fields for the predefined address book appear in the Available fields menu.
In the Available fields menu, click the fields you want to use in your address book.
Select one item at a time by clicking. Alternatively, to select multiple items, hold Shift and click each of the items separately.
Click the icons single right arrow and single left arrow to move selected items to or off the Selected fields list.
To move all available fields to the Selected fields menu, click the icon double right arrow.
Use the icons up arrow and down arrow to adjust the order of the selected entries, then click Next.
The fields appear in the table and forms in the order in which they are listed.
Make sure each of the fields is defined correctly.
You can change the field name, type, maximum characters and whether it is a required field. For this example, leave the settings as they are, then click Next.
Make sure that Create a primary key and Automatically add a primary key are activated. Additionally activate Auto value.
Proceed with Next.
Give the table a name, and activate Create a form based on this table.
Proceed with Finish.